Jenkins Beginner: My First Continuous Integration
Hiroki Maruchi and Shoichi Iwai, GBA Co., Ltd.
Table of Contents
- Introduction
- INSTALLING JENKINS
- USING JENKINS
- CONNECTING JENKINS AND THE EMULATOR: CREATE AN AUTOMATIC TEST
- CONCLUSION
1. Introduction
Jenkins is an open source, continuous integration (CI) tool.
Jenkins integrates with version control tools (Git and CVS are examples of such tools) and integrates with the build for programming languages, such as Java, for which compilation is necessary, shell script, and batch commands. With the use of Jenkins, you can build a project platform that groups development projects. Moreover, by continuously using Jenkins in projects, it can provide an integrated infrastructure that improves communication between development team members and the work process.
This article provides a demonstration of Jenkins using simple examples. Additionally, subsequent articles integrate with RTK and create a platform to automatically test actual smartphones.
2. Installing Jenkins
Installing Jenkins
Here, we show an example of installing Jenkins with Homebrew.
Run Terminal and input the following command:
hiroki-no-MacBook-Air:~ hiroki$ brew install jenkins
==> Downloading http://mirrors.jenkins-ci.org/war/1.602/jenkins.war
0.3%
######################################################################## 100.0%
==> jar xvf jenkins.war
==> Caveats
Note: When using launchctl the port will be 8080.
To have launchd start jenkins at login:
mkdir -p ~/Library/LaunchAgents
ln -sfv /usr/local/opt/jenkins/*.plist ~/Library/LaunchAgents
Then to load jenkins now:
launchctl load ~/Library/LaunchAgents/homebrew.mxcl.jenkins.plist
Or, if you don't want/need launchctl, you can just run:
jenkins
==> Summary
/usr/local/Cellar/jenkins/1.602: 6 files, 66M, built in 99.7 minutes
hiroki-no-MacBook-Air:~ hiroki$
Running Jenkins
Next, we will use Terminal to run Jenkins from a shell.
Input the following command:
$ java -jar /usr/local/Cellar/Jenkins/1.602/libexec/Jenkins.war
Confirming That Jenkins is Running
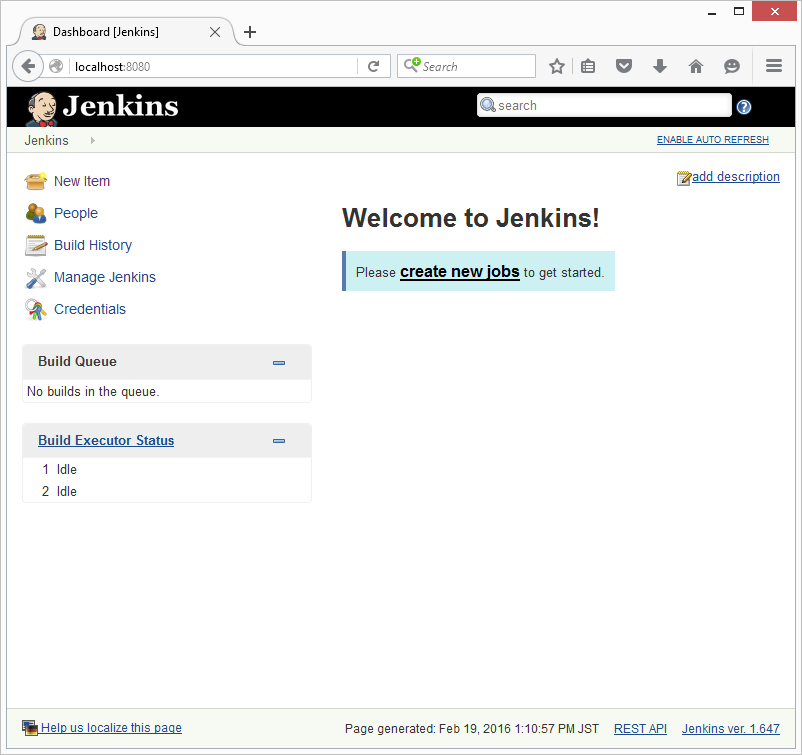
Let's access the running Jenkins and display it.
Start your Web browser, input http://localhost:8080 into the address bar, and press the ENTER key. The Jenkins screen will appear as follows:
3. Using Jenkins
Creating a Job: Create Hello World
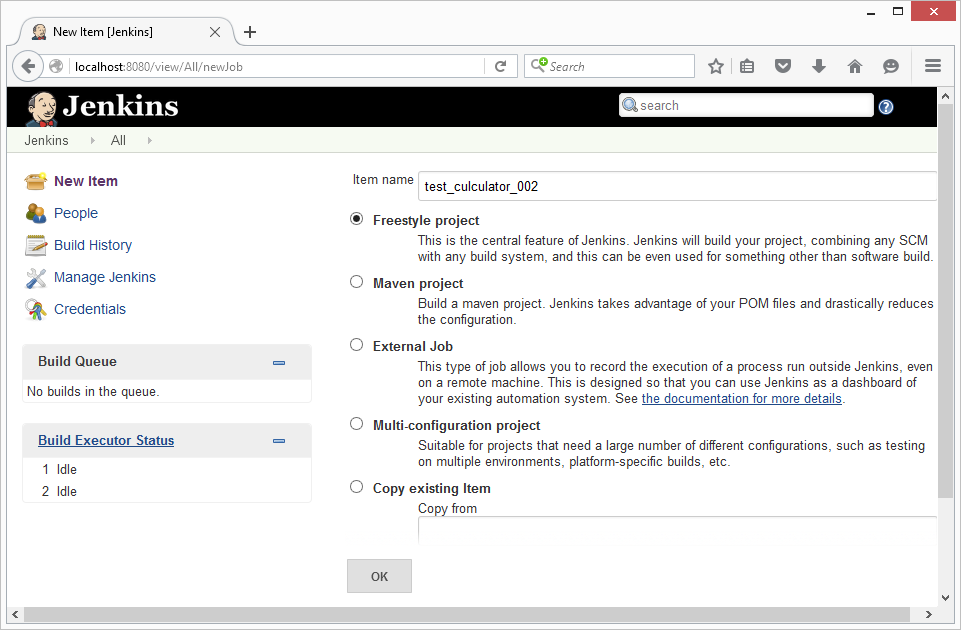
Creating a new job
Click New Item. The Job Basic Settings screen appears. Here, we will input the following items.

Settings:
| Settings name | Value | Notes |
|---|---|---|
| Item name | Test | Any desired name |
| Check box | Freestyle project |
Click OK to move to the next screen.
Advanced settings
The Advanced Settings screen appears. Here, we will input the following items.
Build settings
From the drop-down menu, select Execute shell.
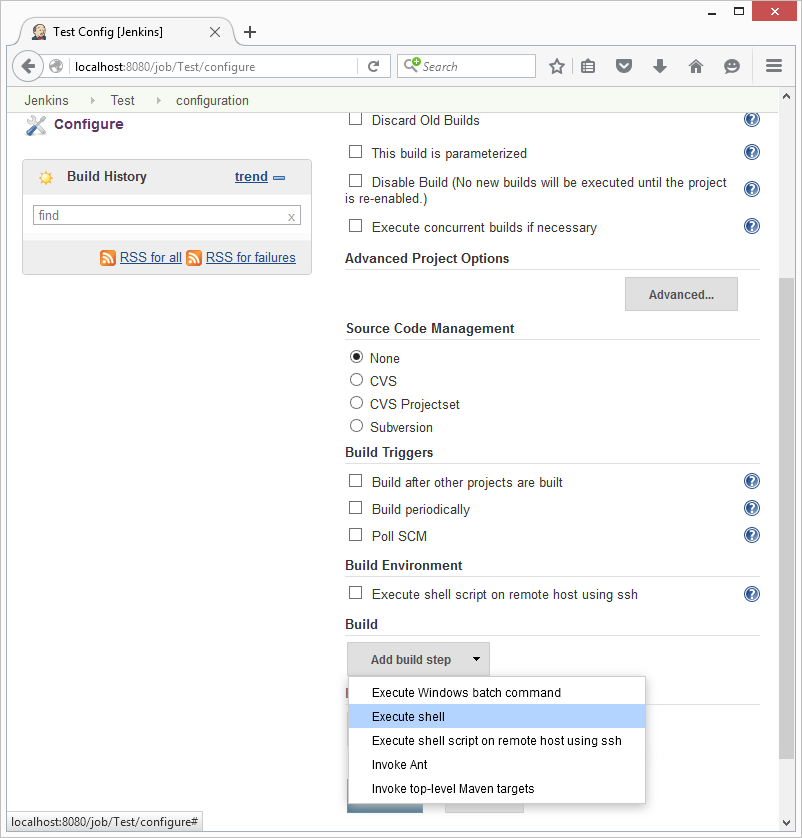
The Command field will be added and then displayed. Here, we will input the following into the Command field:
echo 'hello world.'

Running a job
Display the Jenkins top page. If a job has been registered, a screen similar to the following appears.
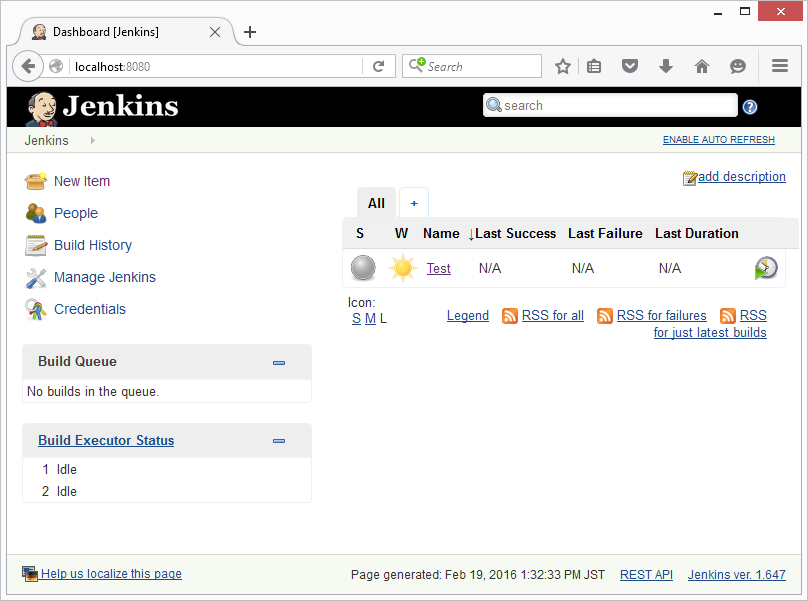
Select the job that you want to run.
Running a job
The top page of the job that you created appears.
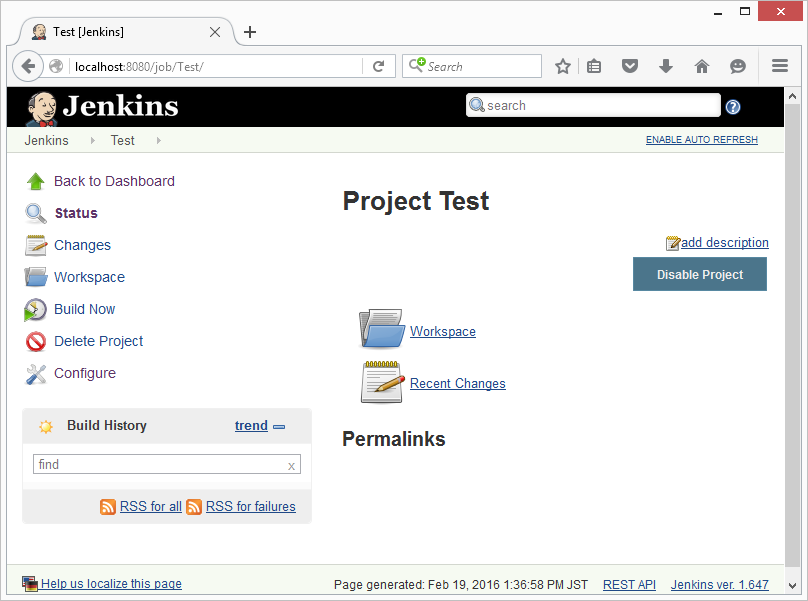
Here, select Build Now.
After a short while, the run result is added to the Build History field.
Displaying the run job result
Click the job that you want to display from the Build History field. A page showing the detailed results of the run job appears.
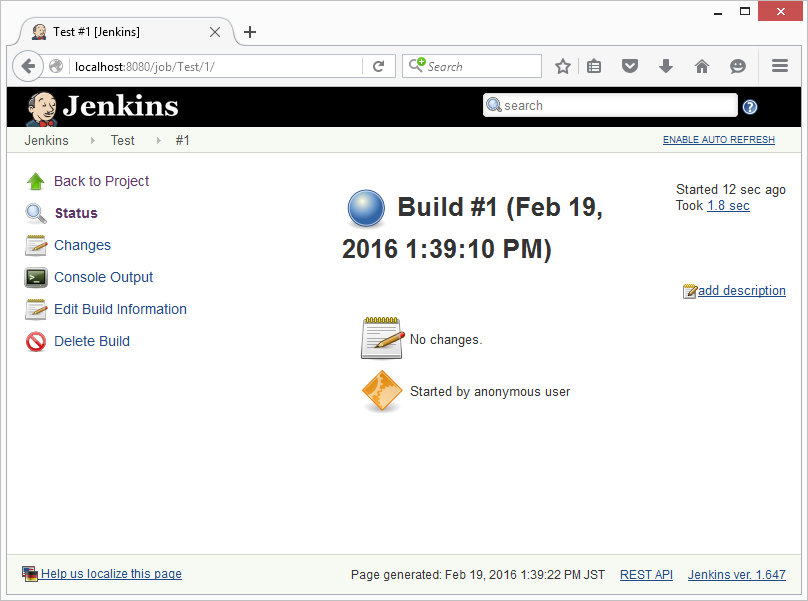
Now click Console Output. The run result of the registered shell script appears.
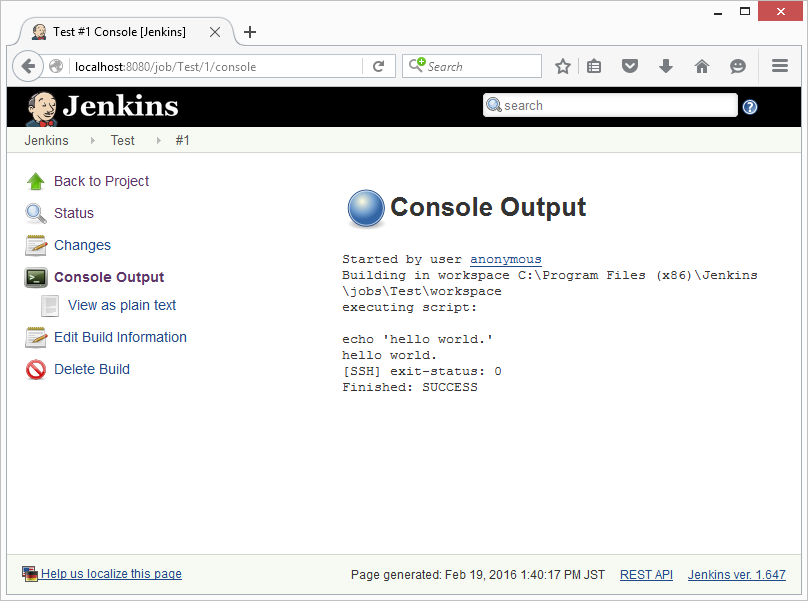
Conclusion
In this chapter, we used Jenkins for the first time and created a very simple job of only displaying a message.
In this example, notice that we ran a shell command of a development PC that runs Jenkins. Like in this example, in Jenkins you can register and group various operations necessary for software development, such as commands, into a job. You can group necessary operations into a job and register it as one meaning in Jenkins. This means that they can be run with one GUI button. Jenkins runs the provided operations and records the result.
The level of abstraction for commands issued with the CUI are comparatively high and a certain amount of development skill is required. In contrast, with Jenkins anyone can run even complicated and difficult operations with the click of a button by grouping them like this by meaning. Moreover, as Jenkins can be accessed with a Web browser, it can be shared with and accessed by members of a team such as a development group. Next, let's register useful functions in a Jenkins job so that development operations and testing can be performed easily.
Creating a Job: Build an Android Studio Project
In the previous procedure, we displayed a simple message. This time, we will operate Android project, which is created by using Android Studio, on Jenkins.
Generally speaking, apps for Android are developed in Java. In Java, the source must be compiled to run the app on an actual device. In the previous article, the developer's Run button was clicked to run this compile. In the same manner as this procedure, we will run it on Jenkins.
Creating a new job
Create a new job.
Input a job name and select Freestyle project.
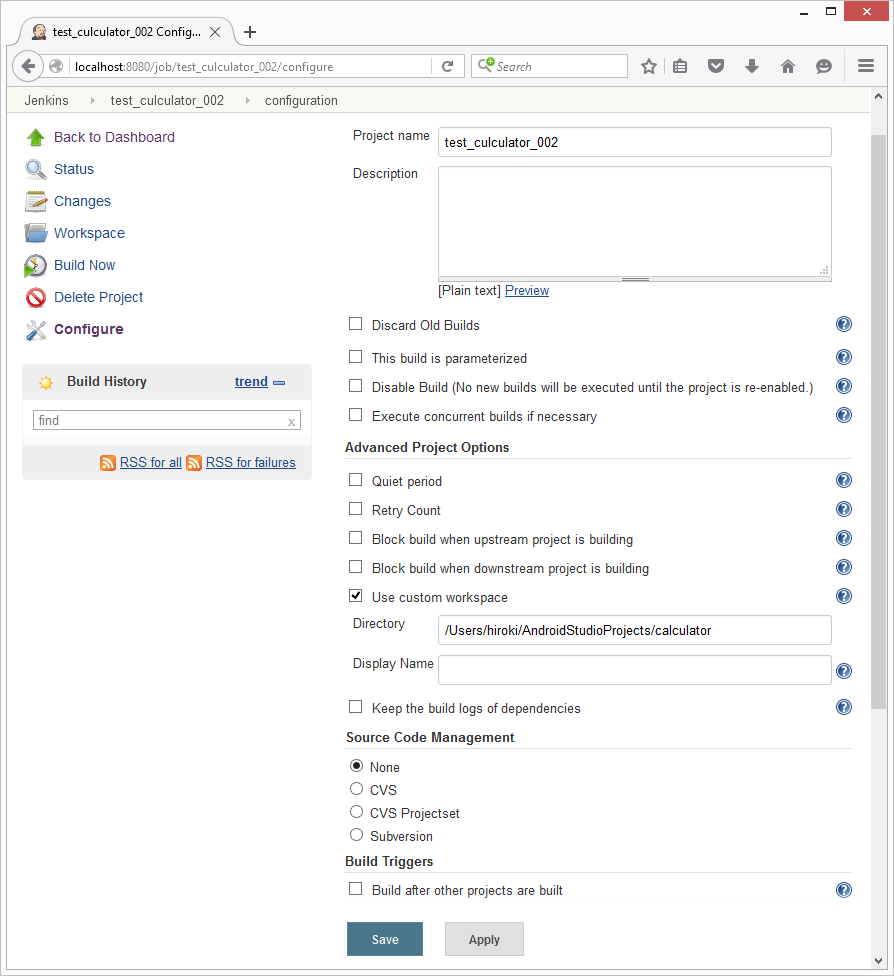
Specifying the source code location
Advanced project option
> Use a custom workspace
> Directory field: /Users/hiroki/AndroidStudioProjects/calculator
Build
> Run the shell
> Command field: ./gradlew build # Run the build
Post-build Actions
> Save the result
> Field for the file to be saved: **/*.apk
Once setup is complete, click the Save button to save the job.
Running a job
Click Build Now. The job runs.
Displaying the result
When a job is run and then completes, the result of whether the job ran successfully or failed is succinctly displayed using the icons of green and red traffic lights. At the end of this job, the .apk file is displayed on the project main page as "result of the latest successful build." You can download this file directly.
4. Connecting Jenkins and the Emulator: Create an Automatic Test
In the previous chapter, we used Jenkins to automate everything up to the build. This time we are going to try to install the app we built on the emulator and check whether it is installed successfully. We will also rent an actual device in the cloud with RTK and in the same way install the app and check whether it was installed on the device.
Connecting to an Emulator
Install the .apk file built in Jenkins on an Android emulator.
Firstly, start the virtual Android terminal (Android emulator) configured on the development PC, and then install the app file on the emulator.
Preparation
Starting the emulator
Start the Android emulator on the development PC and make this accessible from Jenkins. Firstly, start the Android emulator. Input the following command:
hiroki-no-MacBook-Air:calculator
hiroki$ /Users/hiroki/Library/Android/sdk/tools/emulator -netdelay none -netspeed full -avd Nexus_5_API_21_x86&
Once you input the command, the virtual terminal screen will appear.
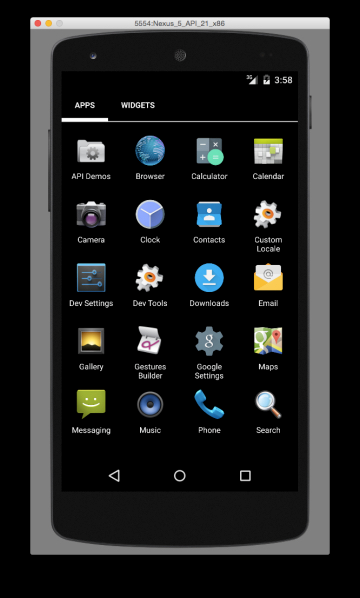
Keep the emulator running so that it can be accessed from Jenkins at any time.
Creating a Job: Install the App on the Emulator
Setting up a job
Modify the project we created in the previous procedure. Specifically, only the following procedure is added.
- Check the connection to the Emulator
- Install the .apk file on the Android emulator
Advanced project option
> Use a custom workspace
> Directory field: /Users/hiroki/AndroidStudioProjects/calculator
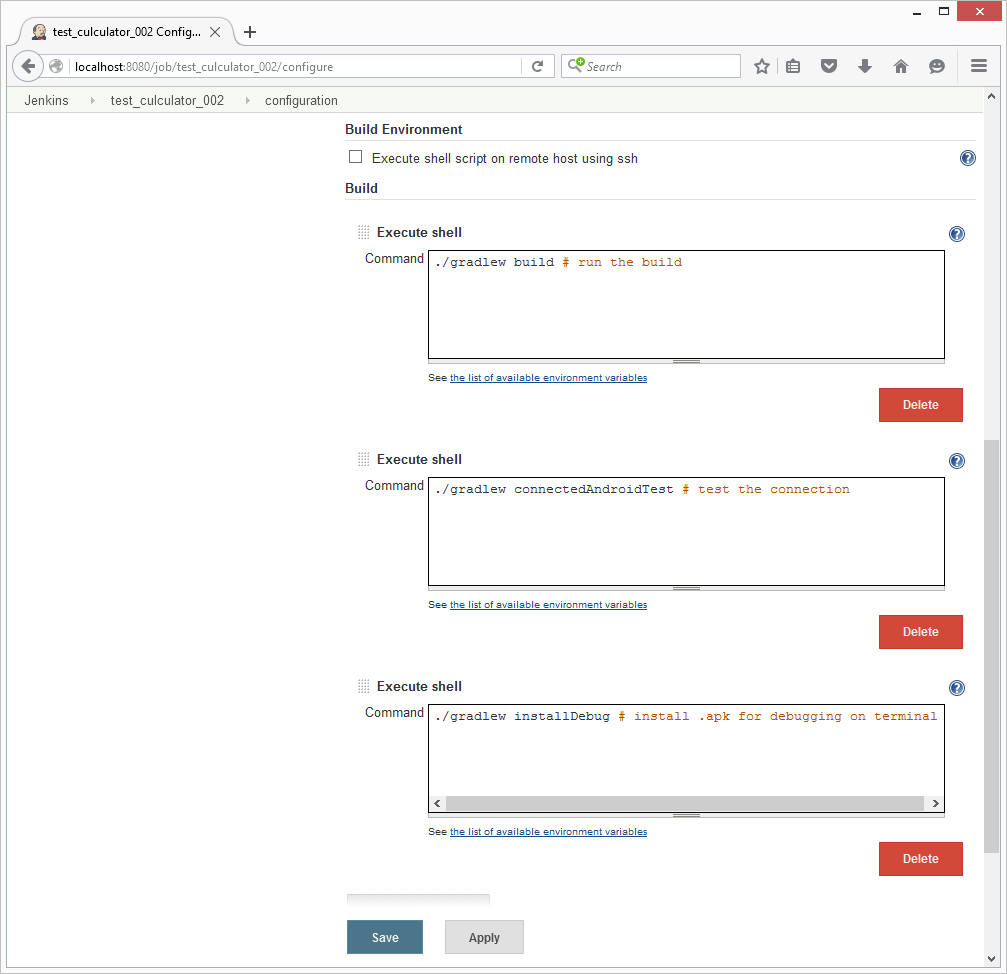
Build
> Run the shell
> Command field: ./gradlew build # Run the build
> Run the shell
> Command field: ./gradlew connectedAndroidTest # Test the connection to the terminal
> Run the shell
> Command field: ./gradlew installDebug # Install .apk for debugging on terminal
Post-build Actions
> Save the result
> Field for the file to be saved: **/*.apk
Once setup is complete, click the Save button to save the job.
Starting a job
Start a job in the same way as the previous procedure. Once the job runs, check the connection with the emulator, and install the built .apk file on the Android emulator.
Displaying the result
Once the test completes, a screen similar to the following appears.
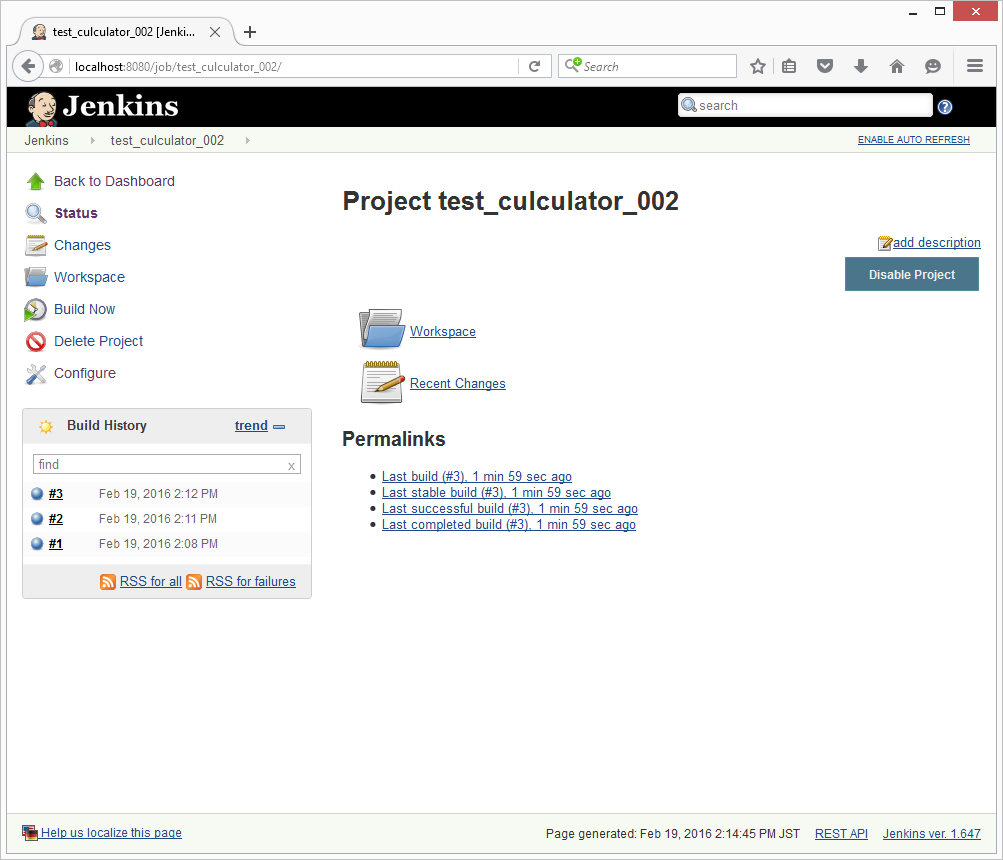
If a test is successful like this example, a green light is displayed to indicate that it was successful.
If you click the row with the latest time in the build history, the details of the result will be displayed. If you click Console Output, the recorded console rows will all be displayed.
The details of the results for the project built from the source, connection test, and installation of the .apk package on the emulator running on the development PC will be displayed. In this example, at the end of every row "BUILD SUCCESSFUL" is displayed (none are displayed as "Error").
5. Conclusion
In this article, we used Jenkins to register operations like a build that used a shell command in a job, and ran the job.
Normally, when developing an Android app, considerably difficult and complicated operations, such as the Java build and compile, must be performed internally. Therefore, a lot of the times those operations can only be understood and run by the person in charge, and that tends to become a "personnel" bottleneck when looked from the overall development process.
In Jenkins, by registering these operations in jobs, an operation interface for run links and the like is provided, and just the success/fail result can be indicated. Complicated operations can be hidden, processes can be converted to symbols and modules, and used publicly. Through this, an objective and clear overall development process can be created.
By using the continuous integration tool Jenkins, app developers, programmers, designers, testers, and any stockholders related to development can share builds and tests. Each process can be "visualized," meaning that a platform can be put into place in which any inefficiency can be improved and software can be created by all parties.
In the next article, we will use the RTK feature called RTK Thrift API to control an actual rental smartphone from the software.
In the article after that, we will sum everything up and build a platform to carry out continuous development activities with project members who continually test actual smartphones from Jenkins.
Glossary
Homebrew
Package management software for Mac OS X
References
K. Sato, T. Wada, M. Kawamura, et al. (2015) Jenkins jissen nyumon (Practical Introduction to Jenkins), Gijutsu-Hyohron Co., Ltd.
M. Fewster and D. Graham (1999) Software Test Automation, Addison-Wesley