Nomad Actual Device Testing with Remote TestKit (Part 1)
1. Introduction
Wouldn’t you agree that, since smartphone apps are social infrastructure supporting our information society, they should be tested in parallel with development? Programmers create and run unit tests either before or after coding. Once apps have been developed, operations are immediately verified with emulators or smartphones on hand, right? For commercial apps, system testing and other types of testing are conducted on actual devices at considerable expense. This is done to eliminate any serious bugs in the apps that might have social ramifications.
To detect such bugs, however, merely conducting unit testing is insufficient because such testing only targets the layers close to pure logic. One must enumerate every possible bug and verify operation. Thus, commercial apps are tested on an unbelievable number of mobile devices, any of which may be employed by a user. Companies spend as much time and money as they can to gather up these devices, sometimes by the hundreds. Among the devices used for testing are even types that few people have been using recently and those that are special and difficult to obtain (and thus not commonly available on the market). Acquiring a good number of smartphones for use requires tremendous amounts of money and time.
Moreover, companies must strictly manage testing devices due to security concerns. As such, one cannot easily take them out even for demonstration purposes. Those developers who enjoy trying out new things cannot actively introduce agile development and verification methodology for such administrative and economic reasons. Agile development is similar to Monotsukuri (manufacturing), which has enjoyed great success in Japan’s manufacturing industry. However, the current state of the software industry has given rise to the concern that development may stagnate since developers cannot harness agile development, a software version of Kaizen activities, as much as they wish. Furthermore, venture companies, which have only limited resources, cannot spare enough time for testing because of their limited procurement budgets even if they have excellent technical capabilities.
As you can see, in addition to managerial restrictions, software testing requires significant personnel and financial resources. These are barriers which deter technical breakthroughs.
There are no silver bullets in software development. However, this series of articles will introduce a way to develop competitive high-quality software at lower cost using Remote TestKit (Remote TestKit). This method enables on-demand procurement of actual devices through the cloud.
In this article, we will first verify the operation of a smartphone app on an actual device. This is the basic way to verify smartphone apps. Next, we will show you how Remote TestKit enables you to do the same thing without a physical smartphone on hand. If you are interested in the tests themselves described here (including the timing to conduct testing, granularity, and testing overall), you may want to read the previous article.
2. Trends in smartphone app testing
As mentioned in the previous article, testing encompasses the majority of processes in commercial software development. Recently, testing automation tools, including CI (Continuous Integration) tools such as Jenkins, Silk Mobile, eggPlant, and QC-Wing have come into the spotlight. These tools are effective not only in making testing efficient (improving productivity by standardization), but also in stabilizing the quality of test results (eliminating inconsistencies and fluctuations due to individual testers) and improving test quality.
3. Benefits of Remote TestKit - On-demand procurement of actual devices
Procuring a large number of actual devices costs time and money, but you can avoid having to do so if you introduce Remote TestKit, which allows you to obtain as many smartphones as necessary when you need them, enabling you to conduct testing without waste. Furthermore, these smartphones are not virtual devices but actual devices operated over the cloud. This means you can test the detailed behavior of actual devices that otherwise would be missed when testing with virtual smartphones.
4. Benefits of Remote TestKit - Combining actual device environments and networks
The previous article described the V-model, which serves as the basis for developing commercial apps. We explained that the base of the V-model represents coding and other processes, where test automation can easily be realized by introducing unit tests and CI tools. On the other hand, test automation is difficult to realize at the top of the V-model. This is due to the fact that while the base of the V-model targets the software itself, and therefore system automation can be realized relatively easily, the top of the V-model requires operating hardware, meaning that operations must be performed manually.
However, with Remote TestKit, we can make significant changes in this area because the software enables operation of actual devices over the network.
In other words, with Remote TestKit, you can enjoy software-like flexibility while incorporating actual device testing into your development process. Not only will this reduce labor, work time, and money incurred by actual device testing compared to the conventional style of development, it will also make a big splash in the development methodology for smartphones and other embedded devices.
In this article, we will show you how to verify the operation of a simple app in a standard Android development environment as an example of the foundation of app development. In the following articles, you will learn how to automate such verification using CI tools.
5. Getting ready: Setting up a test project
This series of articles will build a test automation environment for smartphone apps. We will use a simple calculator app which runs on Android and Android Studio as the Android app development tool.
First, we will verify that the calculator app runs on virtual/actual Android devices using this tool. Later, we will use Remote TestKit to verify that the app runs on Android over the network.
6. Installation: Preparing an actual device and verifying the app
Install Android Studio on the development PC to prepare the development environment. Then, open the development project. After building the development project, install the compiled app on the target machine and execute it.
7. Installing Android Studio
Download the package from Android Studio’s official website to install it. In this tutorial, version 1.1.0 is used.
Packages are available for Windows, Mac OS X, and Linux. Install the appropriate package for the PC you will use for app development (hereafter, we will call this the development PC).
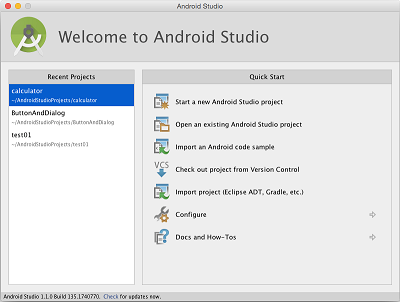
On the Mac, open the .dmg file you downloaded and copy the application into the Applications folder. Click the app file to start Android Studio. Once it starts, the screen shown below will appear.
8. Opening the test project
After installing Android Studio as described in the previous step, click the following URL and download the Android calculator app project onto the development PC. You can open it in Android Studio.
Download the calculator app from the following URL.
Calculator app project
9. Verifying operation on an emulator
First, we will use the emulators included in Android Studio to verify the developed program’s operation. Android Studio includes device emulators by default. By using an emulator, we can verify the developed program’s software operations using only the development PC.
Select “Run” > “Run ‘app’” from the menu. The device selection screen will appear.
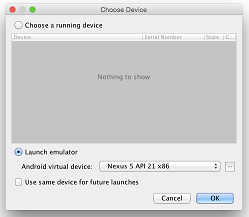
Select “Launch emulator” and click the “OK” button to launch the emulator for the displayed device. After a few moments, the Android smartphone emulation screen will appear on the left side of the screen.
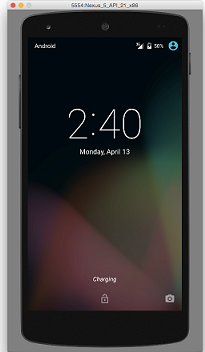
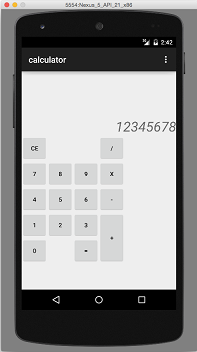
Once the standby screen appears, if you swipe the emulator screen, the calculator app’s initial screen will appear as shown below.

You can now operate the app. If you press some keys,
a number will be shown like that in the screenshot below. By doing so, you can confirm the app can be operated as a calculator.
10. Verifying operation on an actual device
Next, let’s install the developed program from Android Studio onto an Android device and run it on the device. In the previous step, “Verifying operation on an emulator,” you verified operation on an emulator included by default with Android Studio. Now, you will install the app from the development PC onto an actual Android device in order to verify operation.
Use a USB cable to connect the Android device to the development PC on which Android Studio is running.
Once connection is successful, the “Allow USB debugging?” confirmation dialog box will pop up on the Android device. Click “OK”.
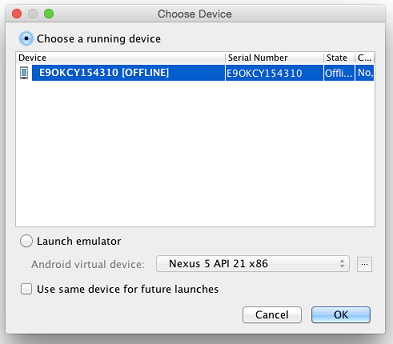
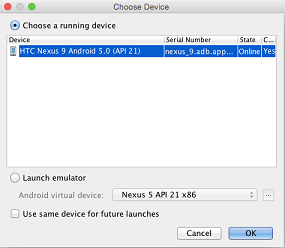
Select “Run” > “Run ‘app’” from the menu. The device selection screen will appear.
Next, the Android device connected via the USB cable will be shown in the Device field. Confirm the device has appeared, select “choose a running device”, and click the “OK” button. The calculator app will then appear on the Android device.
You can confirm that the app can be operated as a calculator by touching buttons on the screen.
11. Installation: (with Remote TestKit) Verifying the app on an actual device in the cloud
Now, you will use Remote TestKit to do the same things you did in the previous step, “Verifying operation on an actual device”.
More specifically, you will install the developed program from Android Studio onto the Android device rented from Remote TestKit and then run the app. In the previous step, “Verifying operation on an actual device”, you conducted testing by connecting an Android device to the development PC via USB. In this step, you will test the app on the same Android device, but this time you will rent the device from Remote TestKit.
Click the Remote TestKit icon on the development PC to launch Remote TestKit.
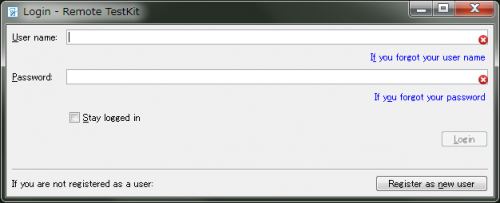
Enter the registered user name and password and click “Login”. Once you are logged in, the list of smartphones will be displayed as shown in the screenshot below.
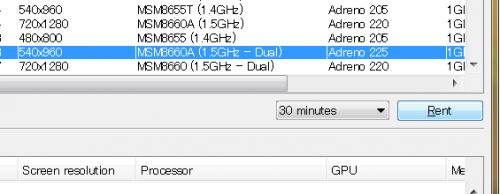
Select a device to rent from among the listed smartphones.
Select a device to rent and click “Rental”. A dialog box will appear prompting you to confirm the content. Do so and click “Rent”.
After a few moments, once the rental has been completed, the device’s screen will appear on the development PC screen.
12. Installing the Android app (from Remote TestKit)
Now, let’s install the calculator app onto the rented device.
Click “Install the app” from “Functions” in the menu. The file dialog will appear.
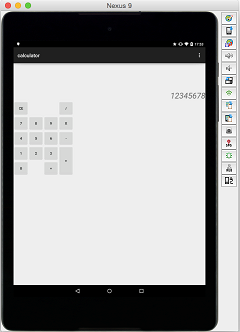
After the dialog appears, select the apk file. This is the actual app that will be run. The file can be found in the directory calculator/app/app-release.apk, which is where you unzipped the downloaded zip file. Once you select the file and click the button, installation starts immediately. After installation is complete, the app will launch immediately. The screen shown below will appear.
The Android device screen shown on the development PC is the screen of the actual device that exists on and is being transferred from the Remote TestKit cloud. The program will be operated on the actual device in response to your screen operations. This enables you to verify operation or give demonstrations using actual devices on the go wherever you are. “Test with actual devices without bringing them with you.” The words sound nice, but isn’t the functionality amazing?
13. Installing the Android app (via an ADB connection)
Remote TestKit has a feature for connecting an Android device with AndroidStudio via ADB.
With this function, you can use smartphone devices rented from Remote TestKit in AndroidStudio or other IDEs as if the devices are actually connected to the IDE. This means the rental device will work in conjunction with the IDE. For example, you can:
- Send and receive files
- Get logs
- Do remote debugging
- Get the app’s status
- Capture device screenshots
In the previous step, “Installing the Android app (from Remote TestKit)”, you merely installed the app onto the rented actual device and verified operation. This function, however, allows you not only to run the app but also to connect the rented device to the IDE running on the development PC via ADB (Android Debug Bridge) and monitor the rented device’s internal information in real time.
Click the “ADT/DDMS/adb” button under “Settings” in the menu.
* To enable this function, you must first set the path to adb.exe in “ADB settings” under “Settings”.
After performing this operation, you can verify the developed program’s operations in Android Studio by downloading it onto the actual device as you did in the previous step, “Verifying operation on an actual device”.
Select “Run” > “Run ‘app’” from the AndroidStudio menu. The device selection screen will appear.
The devices rented from Remote TestKit are listed here. Select “Choose a running device” and click the “OK” button. The calculator app will then be shown on the Android device’s screen.
You can confirm that the app can be operated as a calculator by touching buttons on the screen.
Now, on the development PC, you can display the screen of the actual Android device that exists on the Remote TestKit cloud. At the same time, you can also display logs in AndroidStudio in real time. With this function, you can test or debug the app in your SOHO, on the go, or anywhere else as if the actual device is right next to you. What’s more, Remote TestKit even enables you to verify the internal information of devices on the remote cloud. It’s a strange feeling, isn’t it?
After testing is over, please remember to log off. The installed app will be deleted once the rental period ends.
14. Summary
In this article, we first installed the IDE for Android, Android Studio.
Then, we verified that a simple app operated on an Android device. The virtual simulator supplied with Android Studio and an actual Android device were used as Android devices in testing.
Lastly, we verified the app’s operation on a rental device on the cloud using Remote TestKit. To do so, we first installed the built apk file directly onto the rental device. Then, we connected the rental device with the IDE on the development PC via ADB. We operated the IDE to install and operate the app on the rental device.
In the following articles, we will show you techniques for automating the operations introduced in this manual using various CI (Continuous Integration) tools.
This time, all app operations were verified by developers manually. Such manual operations naturally form the foundation of development and are routine work in most cases. Therefore, if you automate these operations using tools, you can save time and money by avoiding repetitive tasks and testing will also be free from potential skill differences among testers, which may affect outcomes. Automation significantly helps improve work.
Thank you for your interest.
Glossary
Continuous Integration (CI)
Continuously making builds, tests, documentation, etc. while improving the quality of various development work and manufacturing.
Test automation tools
Autonomous devices for determining the validity of operations of test targets (e.g., software based on various threshold values and operation patterns); these are executed from specified programs and do not require human operation.
Jenkins
An open source continuous integration tool
Silk Mobile
An automation testing tool developed by Micro Focus
eggPlant
An automation testing tool developed by TestPlant
QC-Wing
An automation testing tool developed by Japan Novel Corporation
References
Frederick Phillips Brooks, Jr. The Mythical Man-Month, Pearson Education