How to install “Android M Developer Preview” (Nexus 6)
Following the announcement of the next version of Android OS, "Android M," at Google I/O 2015, its developer preview version, "Android M Developer Preview," was released immediately.
Android Developers Blog
http://android-developers.blogspot.co.uk/2015/05/android-m-developer-preview-tools.html
This column describes how to install the Android M Developer Preview on a Nexus 6 device.
To install the Android M Developer Preview, the Android SDK must already be installed on the relevant PC.
Installation on a Nexus 6 device will fail if one follows the same installation procedure as for the Nexus 5 or 9.
In some cases, device “bricking” (in which the OS no longer boots due to a failed installation and, in the worst case, cannot be restored) may occur.
* One of our Nexus 6 devices was bricked, likely because we made a mistake in the installation procedure.
Installing the preview version will re-initialize the device (erase all previous data). Moreover, as this is a developer preview version, correct operation is not guaranteed. In the worst case, the device may become bricked as described above.Please install it at your own risk.
You can also use Remote TestKit.
Remote TestKit now offers Nexus 5 devices with the Android M Developer Preview already installed.
For those who want to try using the next version of Android but are hesitant to install it on their corporate or personal devices, why not experience it on Remote TestKit?
We are offering an "Android M Developer Preview Tryout Campaign" in which we are giving free tickets to Remote TestKit users as part of a limited-time offer.
New users who sign up Remote TestKit on this occasion are also eligible.
Take this opportunity to try out Remote TestKit!
Android M Developer Preview Tryout Campaign
Period: June 3-30, 2015
Eligible persons: all Remote TestKit users who complete the tryout campaign sign-up form during the period.
Application URL: https://appkitbox.com/en/news/20150604-3884
Upgrading Android versions
Upgrade your Nexus 6 to the latest version of Android.
*When we carried out this procedure, we upgraded to Android 5.1.1.
This step may not be necessary, but since one of our Nexus 6 devices was bricked while installing the Android M Developer Preview, we have included this step in the procedure to err on the side of caution. We have confirmed that installation was successful on upgraded Nexus 6 devices.
Downloading the Android M Developer Preview
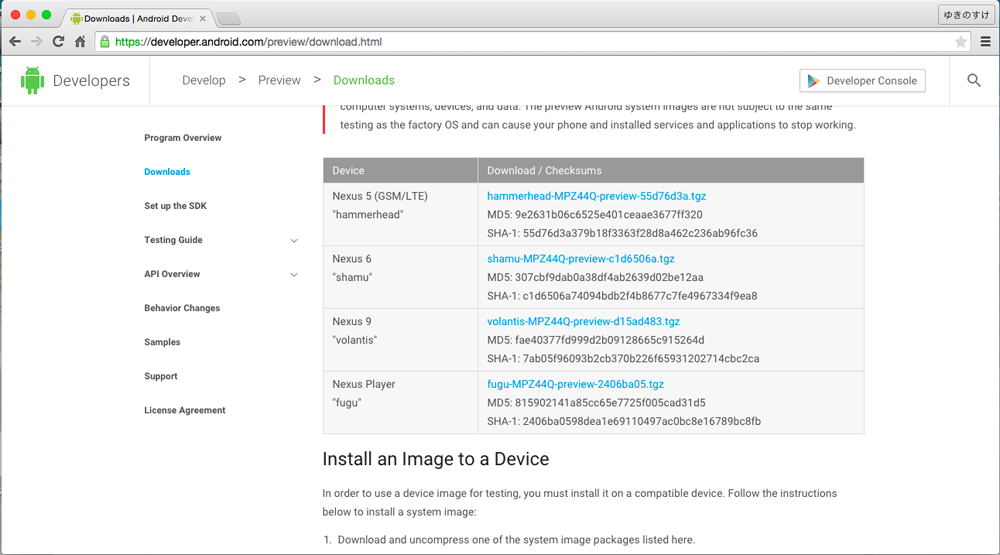
Download site
https://developer.android.com/preview/download.html
At present the preview version can be installed on the following four models:
- Nexus 5 (GSM/LTE)
- Nexus 6
- Nexus 9
- Nexus Player
On the download page, click the following Nexus 6 system image.
Nexus 6(shamu):shamu-MPZ44Q-preview-c1d6506a.tgz
The terms and Conditions will be displayed. Check "I have read and agree with the above terms and conditions" and click the download button.

Installing the Android M Developer Preview
1. Decompressing files (1)
Decompress the downloaded file.
* In the case of Nexus 9, the following file is downloaded:
shamu-MPZ44Q-preview-c1d6506a.tgz
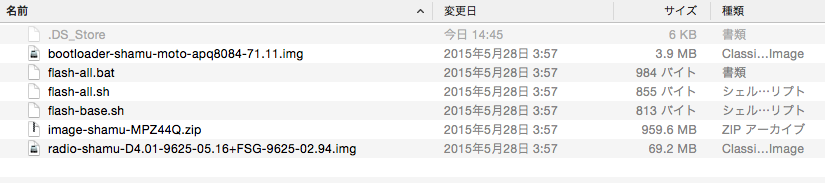
Decompressing this file will generate the following files in the shamu-MPZ44Q folder:
bootloader-shamu-moto-apq8084-71.11.img
flash-all.bat
flash-all.sh
flash-base.sh
image-shamu-MPZ44Q.zip
radio-shamu-D4.01-9625-05.16+FSG-9625-02.94.img
With a Nexus 5 or 9 device, connecting the device via USB and then executing "flash-all.sh" will start the installation. However, if the same procedure is applied with a Nexus 6 device, the installation will fail with the following errors:
OKAY [ 0.734s]
finished. total time: 2.853s
rebooting into bootloader...
OKAY [ 0.001s]
finished. total time: 0.001s
archive does not contain 'boot.sig'
archive does not contain 'recovery.sig'
fastboot(2386,0xa11191d4) malloc: *** mach_vm_map(size=1981542400) failed (error code=3)
*** error: can't allocate region
*** set a breakpoint in malloc_error_break to debug
failed to allocate 1979559444 bytes
error: update package missing system.img
2. Uncompressing the File 2
Decompress "image-shamu-MPZ44Q.zip," which is included in the files you decompressed in "Decompressing files (1)."
Decompressing this file will generate the following files in the image-shamu-MPZ44Q folder.
android-info.txt
boot.img
cache.img
recovery.img
system.img
userdata.img
Next, copy all the decompressed files to the shamu-MPZ44Q folder.
3. Connecting Nexus 6 to the PC
From the setting screen of Nexus 6, open "About phone" and tap "Build number" seven times, which will add the "Developer options" menu to the setting screen.
In the added "Developer options" menu, check "USB debugging."
After finishing the above settings, connect Nexus 6 with PC using a USB cable.
4. Starting the Installation
Open the Windows Command Prompt or OS X Terminal and navigate to the "shamu-MPZ44Q" folder generated by decompressing "shamu-MPZ44Q-preview-c1d6506a.tgz."
Execute the following commands from the decompressed folder in the Command Prompt or Terminal.
- Execute "adb reboot bootloader."
Nexus 6 will reboot and start the following screen:
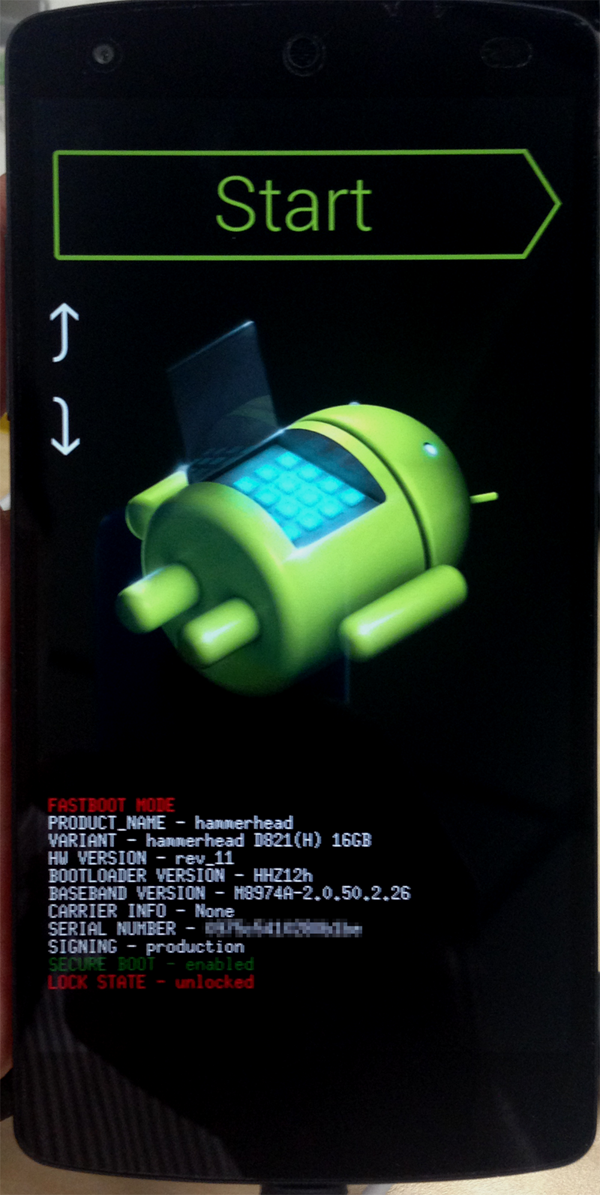
- Execute "fastboot oem unlock."
Select "Yes" on the screen of Nexus 6.
* Select "Yes" using the volume up/down buttons and confirm using the power button.

Instead of "flash-all.sh", execute the following commands in order.
Although some commands take time to execute, make sure to execute each command after the previous one has finished execution.
- Execute "./flash-base.sh".
- Execute "fastboot flash recovery recovery.img"
- Execute "fastboot flash boot boot.img"
- Execute "fastboot flash system system.img"
- Execute "fastboot flash cache cache.img"
- Execute "fastboot flash userdata userdata.img"
- Execute "fastboot reboot"
The Android M Developer Preview installation is now complete.
The "fastboot reboot" command will cause the Nexus 6 device to reboot and display the initial settings screen for Android M, which indicates installation has been completed.